How to Build a GraphQL API with TypeGraphQL and TypeORM
This article was originally written for LogRocket.
GraphQL’s popularity is constantly growing, and it’s no mystery as to why: it’s a great tool that solves many common problems developers encounter with RESTful APIs. GraphQL allows us to easily fetch data relations, but it also prevents us from overfetching that data. Put simply, GraphQL improves the development experience and makes frontend apps faster.
Despite its many advantages, however, building a GraphQL API can occasionally present challenges. How can we minimize the headaches we encounter in our projects?
First, we need to have a schema that defines our types, mutations, and queries with SDL. Then, we need to write the resolvers that will resolve the values for our schema. We also need to define our ORM models that represent the data in our database. The fields we defined in our models need to conform to our schema or it won’t work.
The main issue with this approach is that it’s difficult to maintain. If we want to change a field in our data, we need to change the database model class and GraphQL schema and adjust the type interface (if using TypeScript). But in this tutorial, I’m going to show you an enjoyable way to build a GraphQL API with TypeGraphQL and TypeORM.
TypeGraphQL is a framework for building GraphQL APIs with Node.js and TypeScript. The main purpose of this tool is to let us define our schema directly from our TypeScript code. TypeORM, on the other hand, is a TypeScript library that allows us to interact with SQL databases. With these tools combined, we can build a type-safe GraphQL API without the frustrations that usually come with such a project.
In this tutorial, we’ll demonstrate how to build a GraphQL API with TypeGraphQL and TypeORM that can manage books data with CRUD functionalities.
Prerequisites
Before you get started, make sure that you:
- Understand JavaScript
- Have a general understanding of Node.js and NPM
- Have basic knowledge of TypeScript
Getting started
We’ll begin by initializing a new Node.js project.
mkdir learn-typegraphql
npm init -y
Next, we’ll install some dependencies.
npm install apollo-server type-graphql typeorm reflect-metadata
Here we are installing:
- Apollo Server to build and run our GraphQL server
- TypeGraphQL to generate our schema from TypeScript classes
- TypeORM to interact with our SQL database
reflect-metadatato work with TypeScript decorators
In addition, we need to install some development dependencies.
npm install -D typescript ts-node nodemon
This script will install:
- TypeScript to compile our code to plain JavaScript
ts-nodeto run our server in development environmentnodemonto automatically restart the server whenever we make changes to the code
Now, to make our job a bit easier, let’s define the NPM start scripts in package.json.
{
	// ...
	"scripts": {
		"start": "nodemon -w src --ext ts --exec ts-node src/index.ts"
	}
}
Next, create a tsconfig.json file. This file contains our TypeScript configurations, since we will use some TypeScript features that are currently still experimental, yet stable enough for our purposes.
{
	"compilerOptions": {
		"target": "es5",
		"module": "commonjs",
		"strict": true,
		"esModuleInterop": true,
		"experimentalDecorators": true,
		"emitDecoratorMetadata": true,
		"strictPropertyInitialization": false
	}
}
Make sure the experimentalDecorators and emitDecoratorMetadata are set to true.
For reference, I published the entire source code of this project to my GitHub. Feel free to poke around or clone it onto your computer.
git clone https://github.com/rahmanfadhil/learn-typegraphql.git
Setting up a GraphQL server
It’s time to start working on our server API. Let’s create a new file called index.ts inside the src folder.
import "reflect-metadata"
import { createConnection } from "typeorm"
import { ApolloServer } from "apollo-server"

async function main() {
	const connection = await createConnection()
	const schema = await buildSchema()
	const server = new ApolloServer({ schema })
	await server.listen(4000)
	console.log("Server has started!")
}
In this file, we can write a function called start. This function makes it easier to initialize every single library that we use in this project. In this function, we’ll first create a new connection to our database with the createConnection function provided by TypeORM.
Next, we’ll generate our GraphQL schema with the buildSchema method by TypeGraphQL. This will take all our resolvers and generate an executable GraphQL schema we can use inside our Apollo Server. These resolvers are a little bit different, which we’ll discuss it later in this tutorial.
The reflect-metadata package we imported at the top is a helper library that extends the functionality of TypeScript decorators. This package is required to use TypeORM and TypeGraphQL.
Finally, we’ll initialize our Apollo Server, pass our schema, and start it in port 4000 (or any other port you want).
Database configuration
Remember when we created a database connection with TypeORM? Before we do anything else, we need to define a database configuration to tell TypeORM which kind of database we plan to use and how to access it. There are several ways to do this; personally, I like to create the configuration inside the ormconfig.json file.
Currently, TypeORM supports nine types of SQL databases, including popular ones such as MySQL and PostgreSQL. You can use any database you want, but for the sake of simplicity, I’m going to use SQLite — the smallest implementation of SQL database engine that is very easy to get started. To use this database, we must first install the driver for Node.js.
npm install sqlite3
Now, we can add the ormconfig.json file into our project.
{
	"type": "sqlite",
	"database": "./db.sqlite3",
	"entities": ["./src/models/*.ts"],
	"synchronize": true
}
Resolvers
To build our GraphQL resolvers, we’ll first define the mutations, queries, and other object types in our schema with GraphQL schema language. Then, we’ll define the resolvers in our JavaScript code to resolve the values of our schema.
The resolvers are usually a collection of functions that are mapped into a single object, and it has to match with the schema we defined earlier. This approach seems very complicated because we need to define both the schema and the resolvers in a separate place.
With TypeGraphQL, however, we don’t need to explicitly write the schema. Instead, we define our resolvers with TypeScript classes and decorators, and TypeGraphQL will generate the schema for us.
We can use the code below to define our resolvers with TypeGraphQL.
import { Resolver, Query } from "type-graphql"

@Resolver()
export class BookResolver {
	@Query(() => String)
	hello() {
		return "world"
	}
}
Here we created a class called BookResolver and decorated it with the Resolver decorator by TypeGraphQL. This enables us to place all our resolvers in this class as a method. We also want to make sure we decorate the method with either Query or Mutation and pass the return type on the first parameter.
So far, we just have a hello query that will return a string. Later, we will implement full CRUD to our database with TypeORM.
Now we need to register our resolver in src/index.ts.
import "reflect-metadata"
import { createConnection } from "typeorm"
import { ApolloServer } from "apollo-server"
import { BookResolver } from "./resolvers/BookResolver.ts" // add this

async function main() {
	const connection = await createConnection()
	const schema = await buildSchema({
		resolvers: [BookResolver], // add this
	})
	const server = new ApolloServer({ schema })
	await server.listen(4000)
	console.log("Server has started!")
}
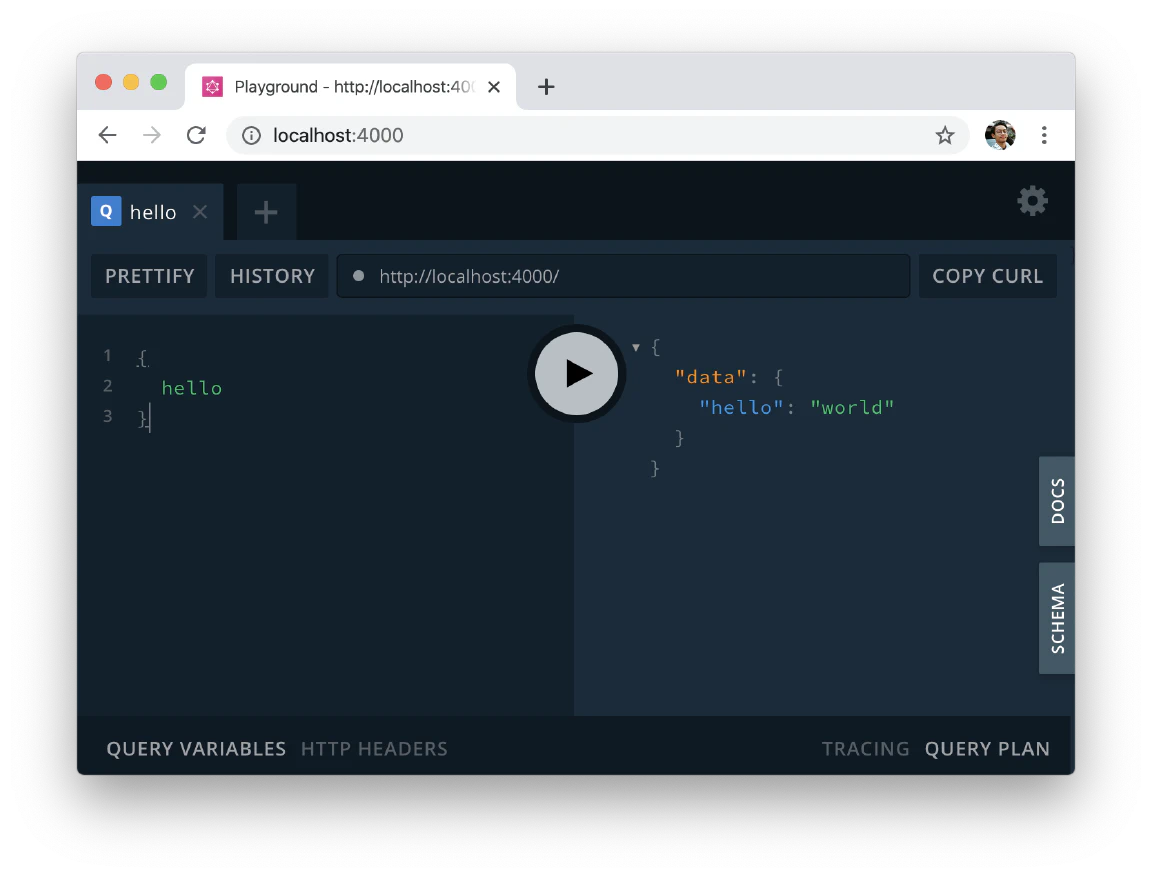
That’s it! To make sure everything is set up properly, let’s try to run our server by running npm start on the terminal and opening localhost:4000 in the browser.
Models
Now that our server is up and running, the next step is to define our models.
A model is essentially a class that allows us to interact with a specific table in our database. With TypeORM, we can define our database models with classes and decorators, just like our resolvers. And because we’re trying to build a bookstore API, let’s create a model that represents our books.
import { Entity, BaseEntity, PrimaryGeneratedColumn, Column } from "typeorm"

@Entity()
export class Book extends BaseEntity {
	@PrimaryGeneratedColumn()
	id: string

	@Column()
	title: string

	@Column()
	author: string

	@Column({ default: false })
	isPublished: boolean
}
A TypeORM model is essentially a plain TypeScript class that is decorated with Entity. This class contains properties that represent the fields of our table in the database. You can read more about it in the TypeORM official documentation.
This class extends the BaseEntity class, which contains useful methods to access our books table.
Object Types
Since we are building a GraphQL API, we also need to define our object types. In GraphQL, every query and mutation returns an object, whether it’s a boolean, string, or a custom object we define ourselves. Just like our models, we can simply define our object types by using classes and decorators.
Here is where the magic happens. We can combine both TypeGraphQL and TypeORM decorators in a single TypeScript class. In that way, we can have a class that represents both GraphQL object type, as well as the database model. The code should look something like this:
import { Entity, BaseEntity, PrimaryGeneratedColumn, Column } from "typeorm"
import { ObjectType, Field, ID } from "type-graphql"

@Entity()
@ObjectType()
export class Book extends BaseEntity {
	@Field(() => ID)
	@PrimaryGeneratedColumn()
	id: string

	@Field(() => String)
	@Column()
	title: string

	@Field(() => String)
	@Column()
	author: string

	@Field(() => Boolean)
	@Column({ default: false })
	isPublished: boolean
}
This makes our code a lot more efficient because we define a single data type in one place, which should help reduce errors caused by property inconsistency.
Let’s say we want to update the isPublished property to published. Traditionally, when using the default GraphQL schema language, we’d need to define our data type in both the database model and the GraphQL schema. However, by using these decorators, we can simply update the property in our class to update both the schema and the model.
Database CRUD
After we create our database models, let’s go back to our resolvers and implement a query that returns all our books.
import { Resolver, Query } from "type-graphql"
import { Book } from "../models/Book"

@Resolver()
class BookResolver {
	@Query(() => [Book])
	books() {
		return Book.find()
	}
}
We’ll create the books method inside our resolver class and decorate it with Query. To specify the return type of our query, we need to pass it inside the Query decorator argument, which, in this case, is an array of books. Inside this method, we fetch our book with the find method from our model.
Now let’s go back to our playground and test this query.
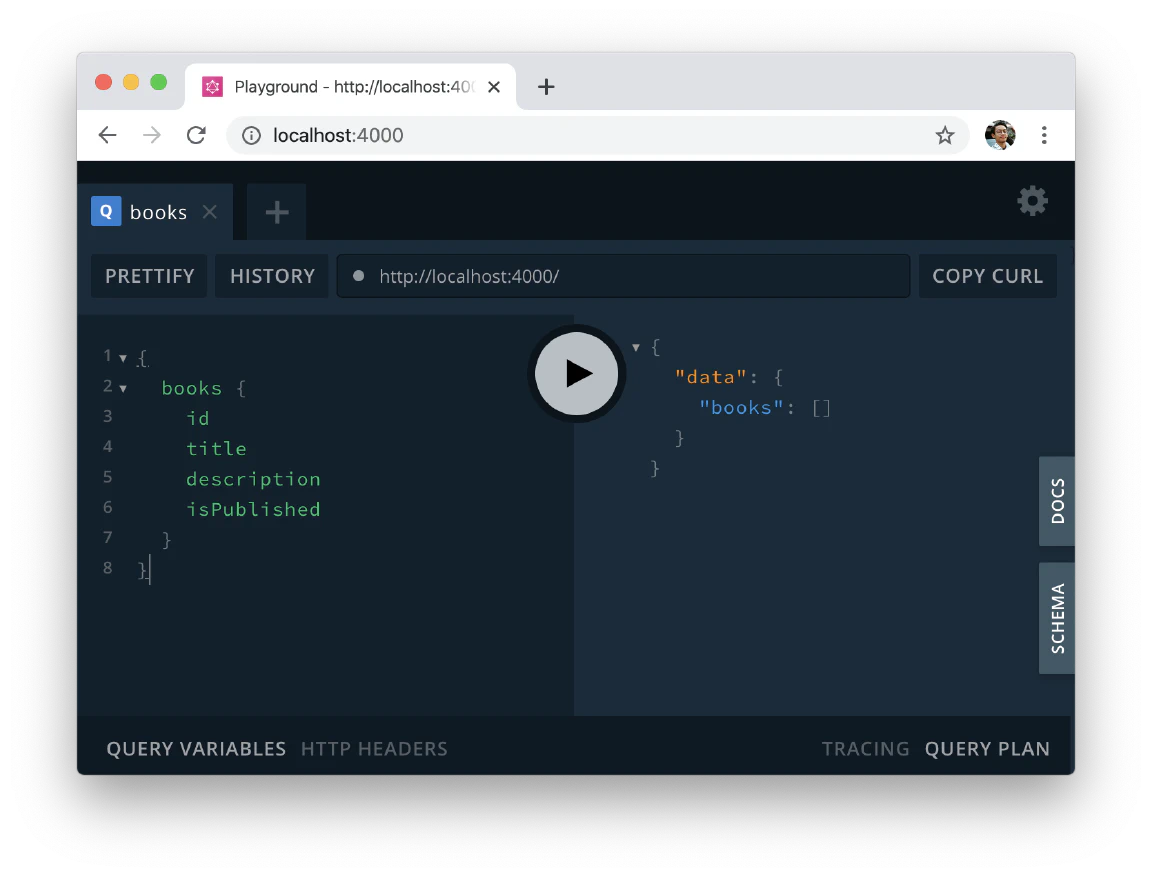
It returns an empty array, which means we’ve yet to create any books. Let’s do so by creating a mutation.
@Mutation(() => Book)
async createBook(@Arg("data") data: CreateBookInput) {
  const book = Book.create(data);
  await book.save();
  return book;
}
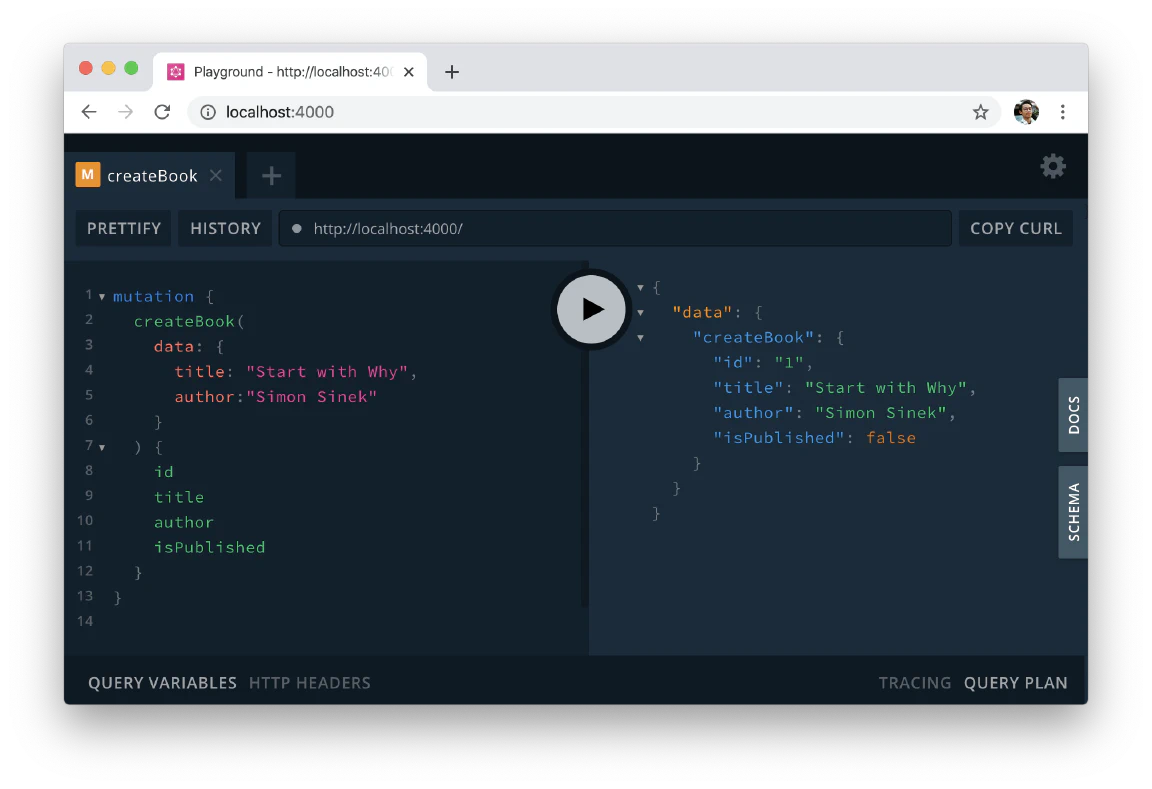
Here, we’re creating a createBook method that will return a book type. In this method, we initialize a new instance of Book, save it to the database with the save method, and return it. This method requires data as a parameter. To obtain data from users, we can build an input type to specify what fields are necessary for this mutation.
Let’s create an input to create a new book.
import { InputType, Field } from "type-graphql"

@InputType()
export class CreateBookInput {
	@Field()
	title: string

	@Field()
	author: string
}
The input type class is similar to our object type. The only difference is that we decorated the class with InputType. Also, the only fields that are necessary for creating a book are title and author, because the id is auto-generated by the database and isPublished field has a default value.
Let’s test it out!
Next, we’ll create a new query to fetch individual book.
@Query(() => Book)
book(@Arg("id") id: string) {
  return Book.findOne({ where: { id } });
}
Let’s try this query:
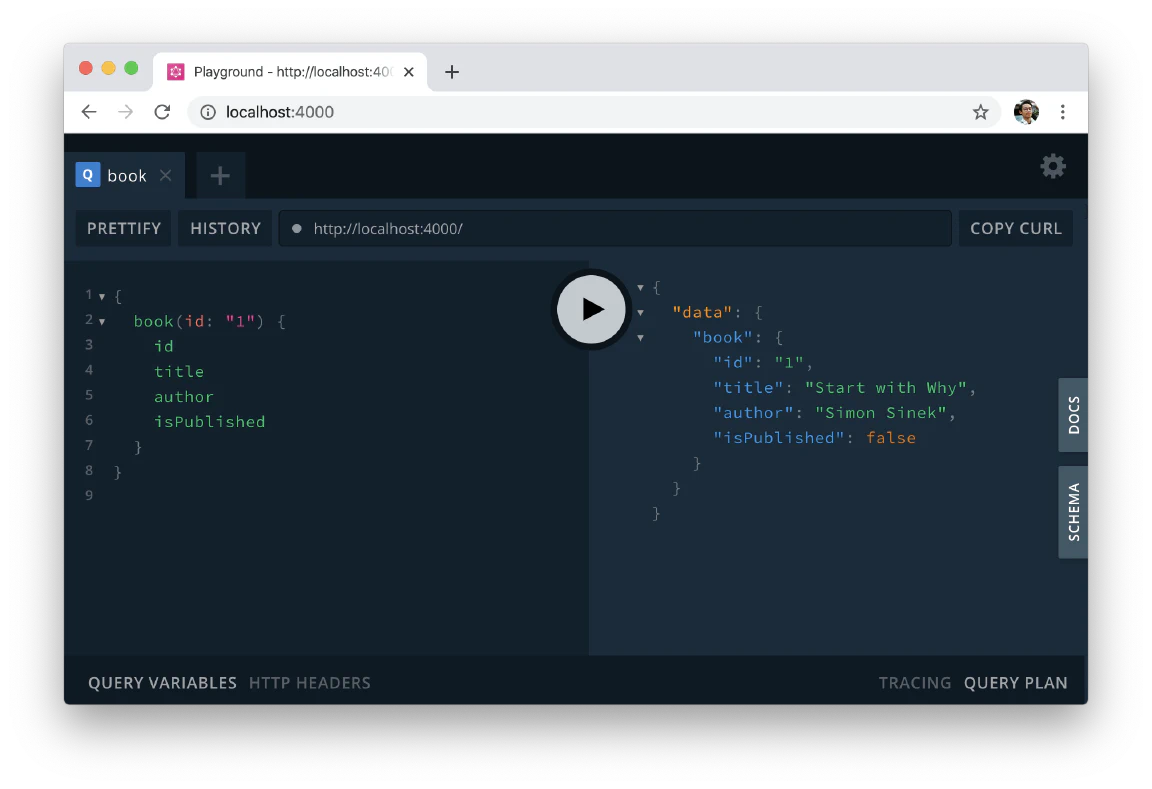
So far, so good!
Now it’s time to add the update operation.
@Mutation(() => Book)
async updateBook(@Arg("id") id: string, @Arg("data") data: UpdateBookInput) {
  const book = await Book.findOne({ where: { id } });
  if (!book) throw new Error("Book not found!");
  Object.assign(book, data);
  await book.save();
  return book;
}
In the updateBook method, we need the id of the book we want to update as well as the user input, which we will create later. First, we’ll fine find the book, if it exists. Then, we’ll update the properties defined in the data parameter. Finally, we’ll save all changes to the database and return the updated book data to the user.
Below we define the input for updating a book.
import { InputType, Field } from "type-graphql"

@InputType()
export class UpdateBookInput {
	@Field({ nullable: true })
	title?: string

	@Field({ nullable: true })
	author?: string

	@Field({ nullable: true })
	isPublished?: boolean
}
The input is very similar to our CreateBookInput class. However, all these properties are optional, which means that user doesn’t have to fill all the properties of the book.
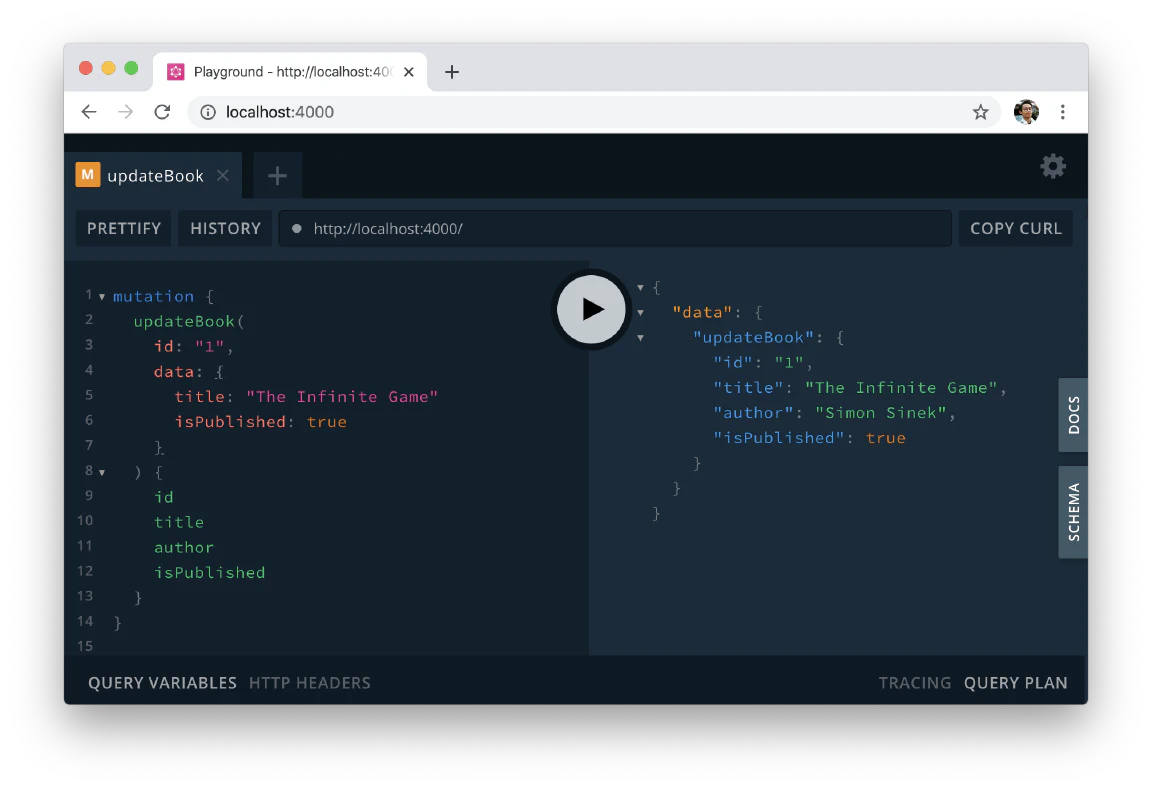
The last step is to implement the delete Book feature.
@Mutation(() => Boolean)
async deleteBook(@Arg("id") id: string) {
  const book = await Book.findOne({ where: { id } });
  if (!book) throw new Error("Book not found!");
  await book.remove();
  return true;
}
The method is pretty straightforward. We find that book from the given id, remove it from the database with remove function, and return true for the result.
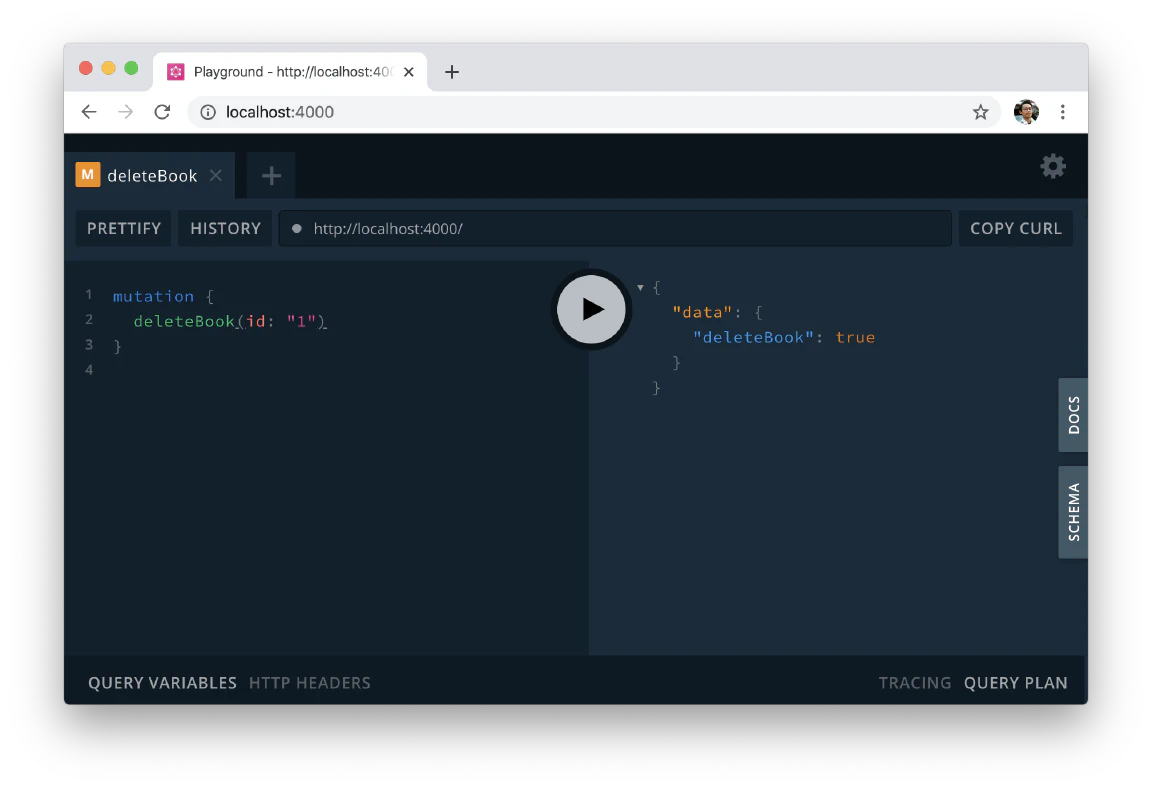
Conclusion
TypeGraphQL can help solve many of the issues developers encounter when building GraphQL APIs, especially with TypeScript. Not only does it offer a cleaner and safer way to build GraphQL APIs, but it also prevents us from repeating the same tasks over and over. It’s even more useful if you use TypeORM because it takes the same approach to defining your database models. These tools are proven to get the job done and should be a top consideration for your next big project.
Tags: GraphQL, Typescript, Api