Build Secure GraphQL API and Deploy to AWS
Building a secure APIs is the main job as a backend developer. But how does it works when using GraphQL? And how to deploy it to AWS Lambda? Well, there are several approaches that we will dive into in this course. Will will learn how to build a simple API with GraphQL. Then, we will implement Authorization to our API, and deploy it to AWS Lambda with Serverless Platform.
Prerequisites
- A bit knowledge of Javascript & NodeJS
- Serverless CLI Installed on your machine
- An AWS account
Getting started
I have prepared the boilerplate of this project. You can clone it, or you can follow along this tutorial step by step if you want.
$ git clone https://github.com/reshuttle/graphql-lambda-demo.git

$ npm install
Clone the repository on github, and go into that folder. Run npm install. Then you will see something like this.
$ tree
├── handler.js
├── middlewares.js
├── package.json
├── serverless.yml
└── yarn.lock
Setting up our GraphQL Server
In this tutorial, we’re going to use the GraphQL Yoga, which is the simplest way to build GraphQL Server with NodeJS. Let’s write our first code then.
const { GraphQLServerLambda } = require("graphql-yoga")

const typeDefs = `
  type Query {
    hello: String!
  }
`

const resolvers = {
	Query: {
		hello: () => "Hello world!",
	},
}

const lambda = new GraphQLServerLambda({
	typeDefs,
	resolvers,
})

exports.server = lambda.graphqlHandler
exports.playground = lambda.playgroundHandler
Now, we have a GraphQL Schema that has a hello query which just returns a Hello World string. Then we’ve exported our lambda and playground handler which the AWS Lambda will looking for.
Setting up Serverless
Serverless is a toolkit to develop a serverless functions, which we can use in various web services Google Cloud Platform, Microsoft Azure, and Amazon Web Services (AWS).
Okay, so let’s configure the serverless setup by adding serverless.yml.
service: graphql-lambda-demo

plugins:
  - serverless-offline

provider:
  name: aws
  runtime: nodejs10.15

functions:
  graphql:
    handler: handler.server
    events:
      - http:
          path: /
          method: post
          cors: true
  playground:
    handler: handler.playground
    events:
      - http:
          path: /
          method: get
          cors: true
In this setup, we have defined two functions. First is the graphql handler, which is the GraphQL API. Second is the playground handler which is a GraphQL IDE to to Explore our GraphQL API.
Then, we are now using the serverless-offline plugin. It is a great plugin to run our functions locally in our machine for development.
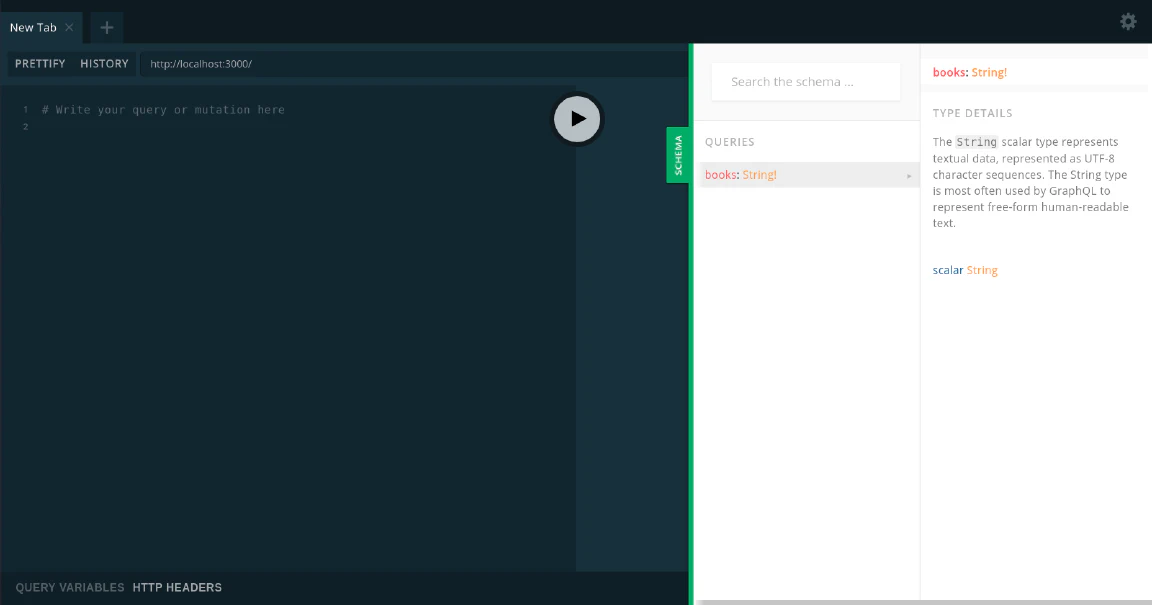
You can run the serverless-offline by running yarn start in the command line. By default, it will started at http://localhost:3000. Then, you will see something like this.
Deployment
Now, it’s time to deploy our API to AWS Lambda. Make sure that you already have and AWS Account, and AWS CLI installed. Then, run this command below in your command line. This will deploy our functions to AWS Lambda.
$ serverless deploy -v
Then, you could test if the function is working by invoking the GraphQL API.
$ serverless invoke -f graphql -l
After the deployment is done, login to your AWS Console.
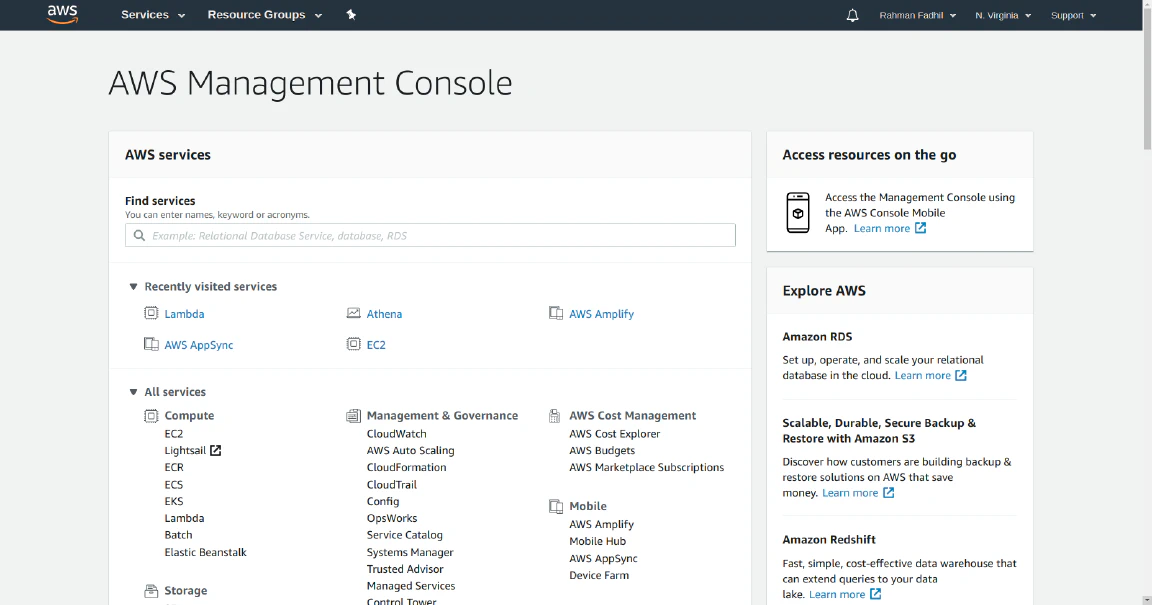
Then, click the Lambda Service on the AWS Services. You will see something like this.
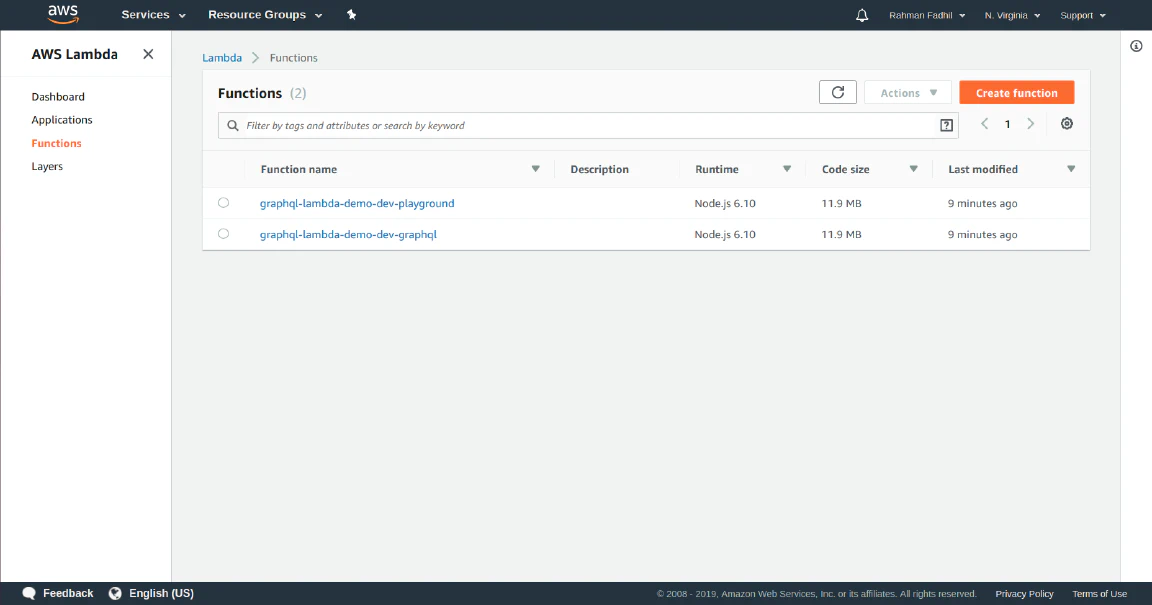
Now, you have two functions deployed. Great job! Let’s move on to the more advanced topics.
Authentication
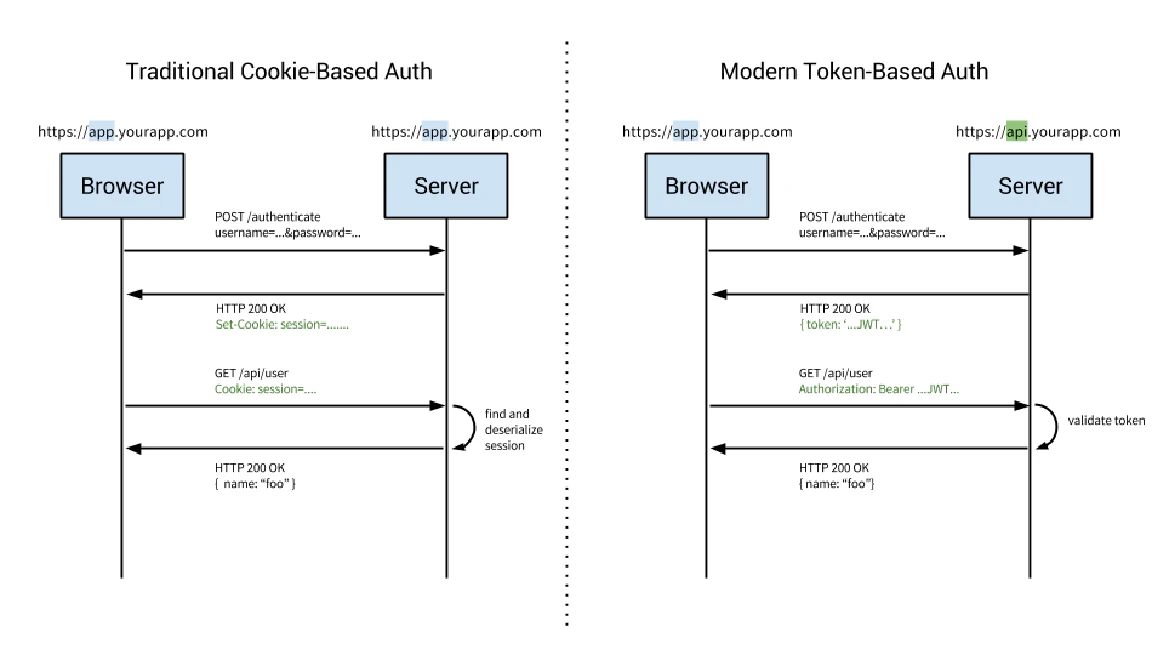
There are two different authentication approach that we’re going to take a look at in this course. There are session based approach and token based approach. In this case, we’re going to use the token based authentication and I will explain it later. But for now, let’s compare it side by side.
Session based authentication
In session based authentication, the server will create a session for the currently logged in user. The session id stored in the browser cookie. The cookie will sent to the server on every request, Since the user stays logged in. Then, the server compare the session id stored in the cookie which sent by the browser against the session that stored on the server to verify the user’s identity.
Token based authentication
When the user log in to the server, the server will respond to the client with a token, which is an encoded data that contains user id as the payload. The browser store the token (usually in local storage), and includes the token in the header with every request. Then, the server will verify the token and extract the payload inside the token to get the user identity.
Many web apps use JSON Web Token (JWT) instead of sessions for authentication. In that way, the user state is stored inside the token, instead of the server. Most of the modern apps use this approach, because of the scalability and mobile device authentication.
Setting up users
Before we get started, we need to set up a few mock users that we will use to perform authentication. Let’s add few things to our handler.js.
// ...

const jwt = require("jsonwebtoken")

// ...

const users = [
	{ id: 1, name: "John Doe", email: "johndoe@gmail.com" },
	{ id: 2, name: "Jane Doe", email: "janedoe@gmail.com" },
]

const typeDefs = `
  type Query {
    login(email: String!): String!
    secret: String!
  }
`

const resolvers = {
	Query: {
		login: (_, { email }) => {
			const user = users.find((user) => user.email === email)
			if (!user) throw new Error("User not found!")
			const token = jwt.sign({ id: user.id }, "your secret key")
			return token
		},
		secret: () => "Secret data",
	},
}

// ...
In this case, the user data doesn’t stored to any database and we don’t use password to login yet. To build the production API, you need to consider using bcrypt for passsword hashing.
Now we have the mock users data, and there are secret field in our query which just return a string. But, we want to secure this field so only the authenticated users can query this field. Then, we have the login query which return a token. The token contains the id of the user which we will use it later. So let’s jump to the next section.
GraphQL Middleware
If you have already familiar with frameworks like Express, Koa, and Hapi, you must have heard about middleware. Basically, it’s a function which will be triggered everytime the client request to the server. GraphQL Yoga has it own implementation of the middleware function.
GraphQL Shield
Another third party library which we will use is GraphQL Shield. It’s a cool library that helps us to create permissions layer in our GraphQL API. Let’s use it in middlewares.js file.
const { rule, shield } = require("graphql-shield")

const isAuthenticated = rule()(async (parent, args, ctx, info) => {
	return Boolean(ctx.userId)
})

const permissions = shield({
	Query: { secret: isAuthenticated },
})

module.exports = [permissions]
In this case, we check the user state (authenticated or not) by checking the ctx.user. But what does it mean? GraphQL has a feature called resolver context, which is a set of data that could be retrieved across resolvers. But where is the context data came from? Let’s jump to the next section.
GraphQL Context
To get the current user state, let’s jump to the handler.js and add few things.
// ...

const jwt = require("jsonwebtoken")
const middlewares = require("./middlewares")

// ...

const lambda = new GraphQLServerLambda({
	typeDefs,
	resolvers,
	middlewares: middlewares,
	context: (req) => {
		const token = req.event.headers.authorization
		if (token) {
			const { id } = jwt.verify(token, "your secret key")
			return { ...req, userId: id }
		} else {
			return { ...req }
		}
	},
})

// ...
Now, we’re using the middlewares that we require from middleware.js. In the context function, First, we check if the client pass the token through the request headers. If the user pass the token, we extract the token to get the id of the user. Finally, we return the userId which we use in our middleware function.
Testing out our server
Let’s test if our server works.
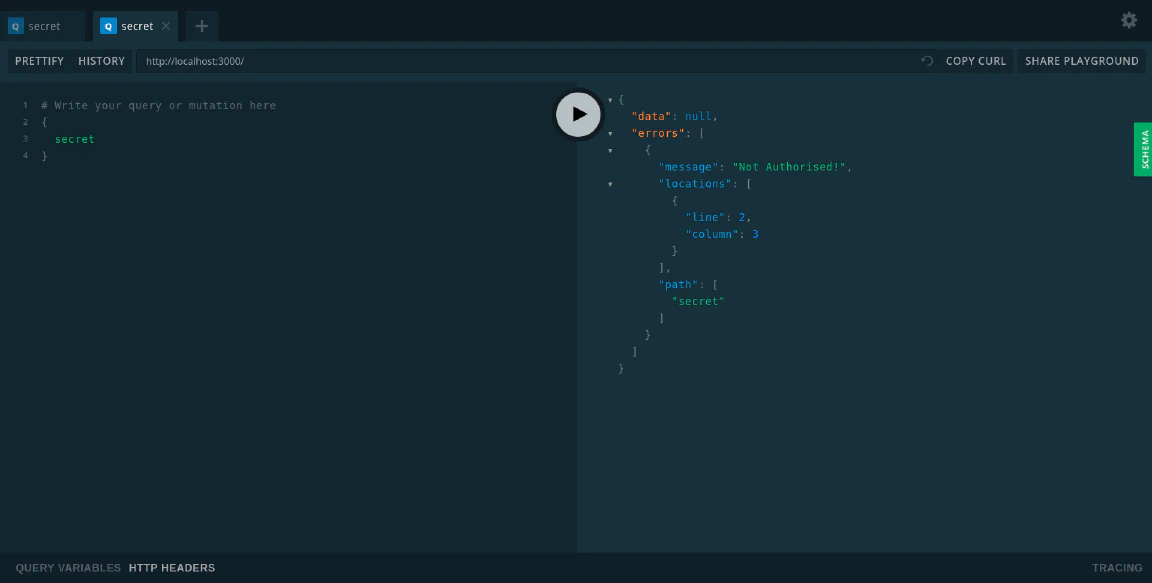
If you access secret without token. The server will throw an error:
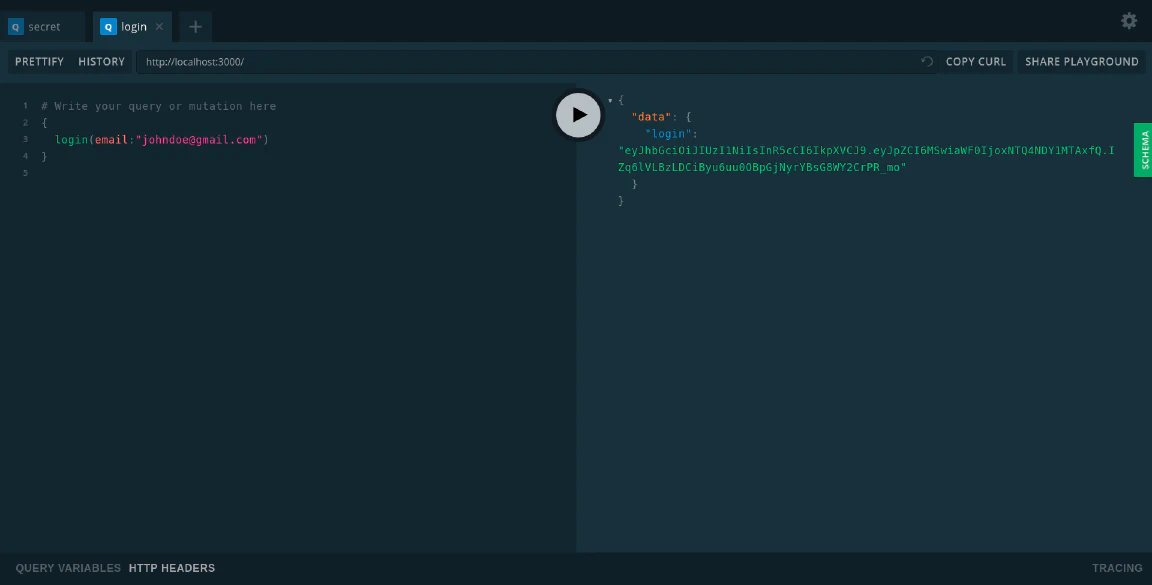
You can get the token by logging in with the email:
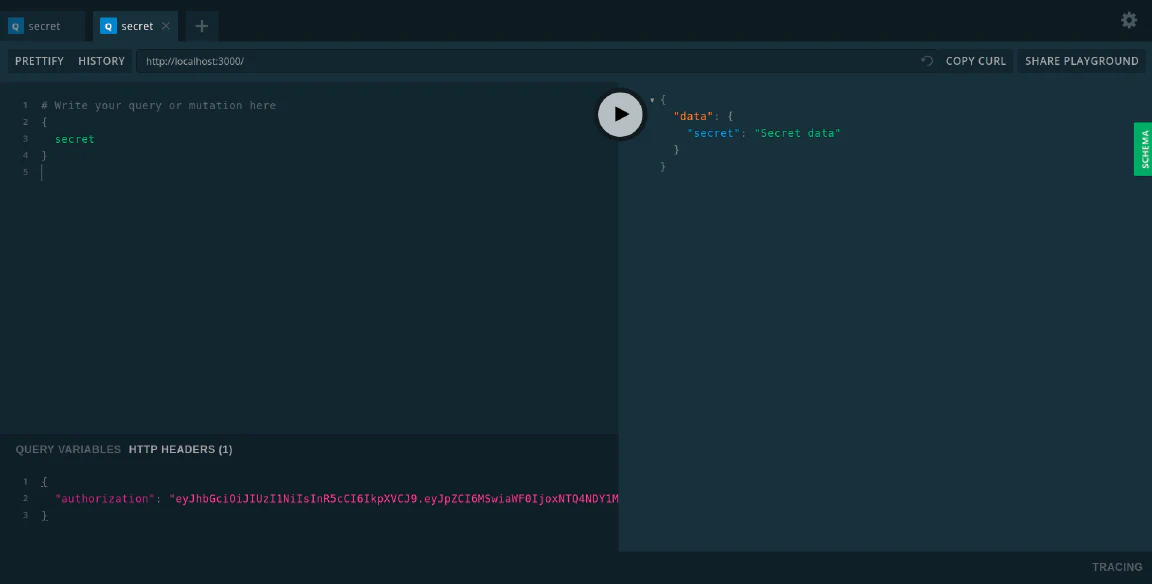
You can access the secret field if you insert the token to the headers:
Conclusion
GraphQL is the one of most hottest topics in 2019. And understanding the core concept is a little bit challenging for most backend developers who’s already comfortable with REST APIs. Also deploying a GraphQL API is tough. But serverless platform make your life easier.