Automate App Deployment with Google Cloud Build
Automation is one of the most important aspects in web development. Cause everyone wants to deliver scalable and reliable web application to their users without thinking about building, testing, and deploying their apps.
This is called the Continuous Integration (CI) and Continuous Delivery (CD). Basically, you want all parts of making and publishing your app go to one place. Because, it’s saves you a lot of time as a developer focus on building apps instead of publishing it.
Getting Started
I have published this code on my GitHub. You can check it out right here, or clone it with the command below.
$ git clone https://github.com/rahmanfadhil/learn-cloud-build.git
This application is written in JavaScript, but you can get started with other languages like Python, Ruby, of Java.
Cloud Services
In order to automate things, you need to use a web/cloud services. It’s basically a services to run things on the cloud.
I this tutorial, we’re going to use Google Cloud Platform, which is an amazing cloud services offered by Google. Although, there are several alternatives out there which you can use to automate your app. But I found GCP is more simple to use and the interface is very friendly.
Here are some alternatives you may consider:
There are two services that Google Cloud Platform provides us in order to build and deploy our web application, which is the Google Cloud Build and the Google Cloud App Engine.
Cloud Build is a Continuous Integration tool to automate build, test, and deployment using pipelines. On the other hand, App Engine is a serverless platform to run and manage our apps on the cloud. In other words, Cloud Build will build our app and App Engine will run it.
Automated Workflow
If you have worked with Continuous Integration before, you know the drill. We publish our code to GitHub, or other providers like Bitbucket or Cloud Source Repositories. Then, Cloud Build will be triggered to build and test our app. If the build and test process successful, our code will be deployed to App Engine. Then, the App Engine will handle the rest.
App Engine Configuration
First, we need to add the App Engine configuration file inside our source code. By default, App Engine will looking for app.yaml file inside the root folder. If you’re using NodeJS, the most basic configuration will look something like this:
runtime: nodejs10
If you use a specific environment variables inside your app, you can add env_variables options followed with your variables.
# ...

env_variables:
  DATABASE_URL: YOUR_DATABASE_URL
If want to deploy multiple App Engine services, you can define your service name (by default is default).
# ...

service: my_service
Cloud Build Configuration
Our next step is to define our Cloud Build Configuration by adding cloudbuild.yaml file.
steps:
  - name: "gcr.io/cloud-builders/npm"
    args: ["install"]

  - name: "gcr.io/cloud-builders/npm"
    args: ["run", "test"]

  - name: "gcr.io/cloud-builders/npm"
    args: ["run", "build"]

  - name: "gcr.io/cloud-builders/gcloud"
    args: ["app", "deploy"]
Google Cloud Build uses somthing called the cloud builders. Which is essentially just a docker image to run our steps that we defined inside our configuration.
Here, we’re using the npm builder image to install our dependencies. Then, we run our tests and build from our source code with the same image. Finally, we’re using the gcloud builder image to deploy our successfully built code to App Engine.
You have your code and its configurations up and running, now it’s time to submit it to Cloud Build by simply running this command below.
gcloud builds submit --config cloudbuild.yaml .
Then, check out your Cloud Build console and you will see your build log. It’s very useful for debugging, especially on the first build.
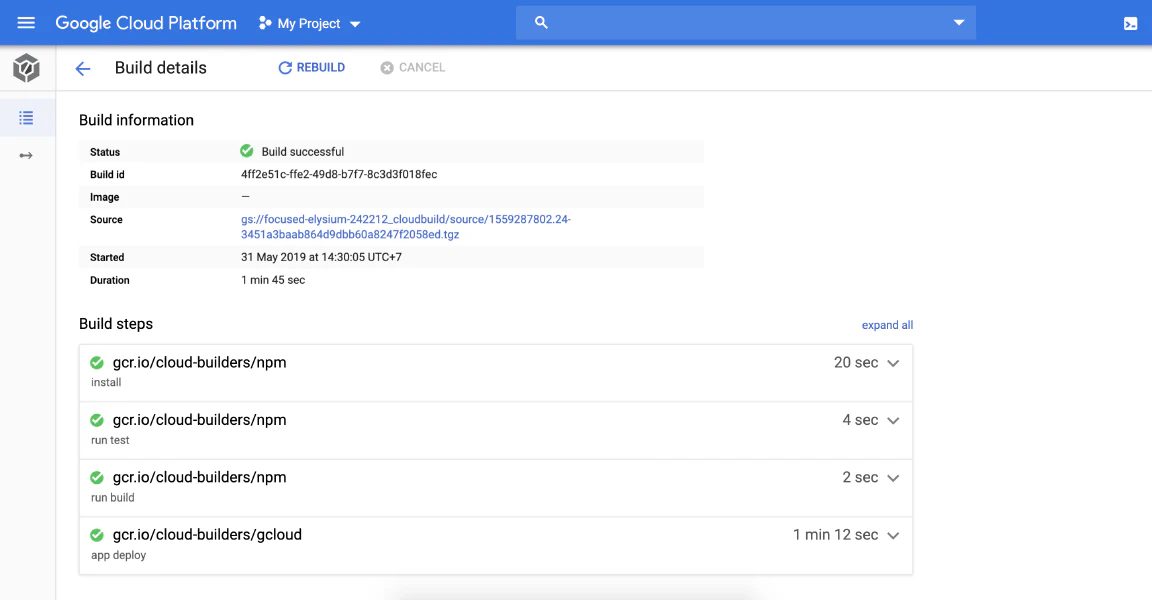
When you build you app for the first time, you should see a weird error at the last step that tells you about permissions denied. It’s because Cloud Build uses a service account to deploy your code, and the default permissions for this account don’t allow certain actions, such as deploying to App Engine.
To grant App Engine Access to the Cloud Build service account:
- Open the IAM page in your console and select your project.
- In the list of members, look for your Cloud Build service account contains
cloudbuild.gserviceaccount.com. - Click the pencil icon in that row.
- Click Add another role.
- From the Select a role dropdown menu, select App Engine and then select App Engine Admin.
- Click Save.
To find out more, please check out this official documentation
It’s pretty common to get an error in this point. If you do, make sure to check out the build log and it should tell you what went wrong.
Create build trigger
In order to run build automatically when pushing your code to your git provider. You need to create a build trigger that instructs the Cloud Build to automatically build your image whenever there are changes pushed to the build source.
First, go to your GCP console. Then, find the Cloud Build section and click the “Triggers” menu.
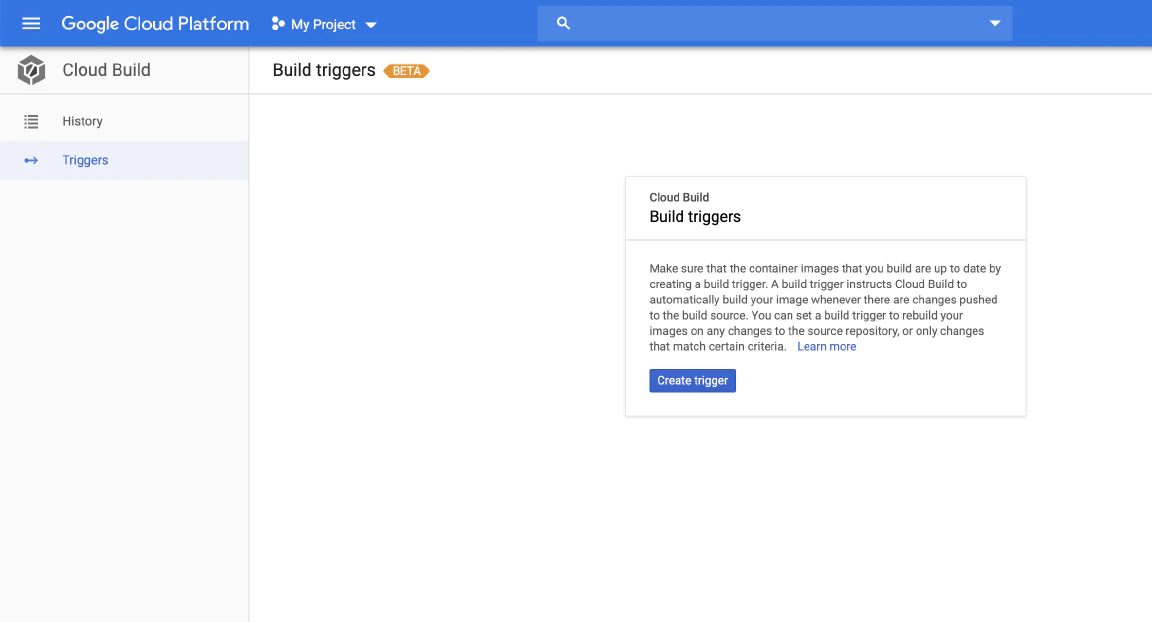
Click the “Create Trigger” button, then choose the git provider you use. In this case I will go with GitHub.
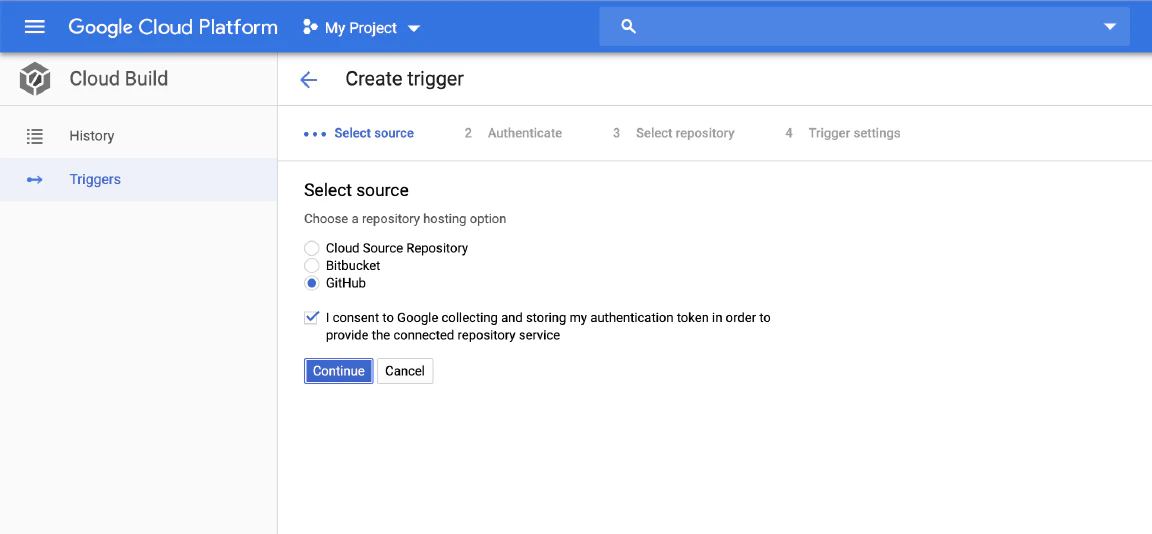
After selecting the source, you need to authenticate Google Cloud Platform with your GitHub account. Then, select the git repository.
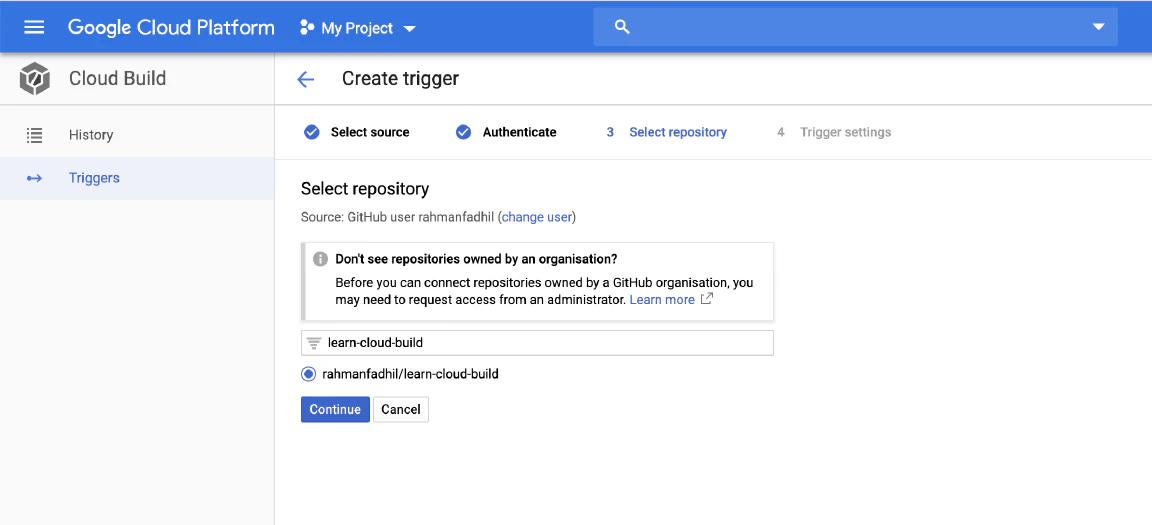
Finally, you need to setup the trigger settings. You can setup the name of your trigger or which branch you want to use. Make sure that your Cloud Build configuration file location is pointing to your /cloudbuild.yaml file (by default is Dockerfile).
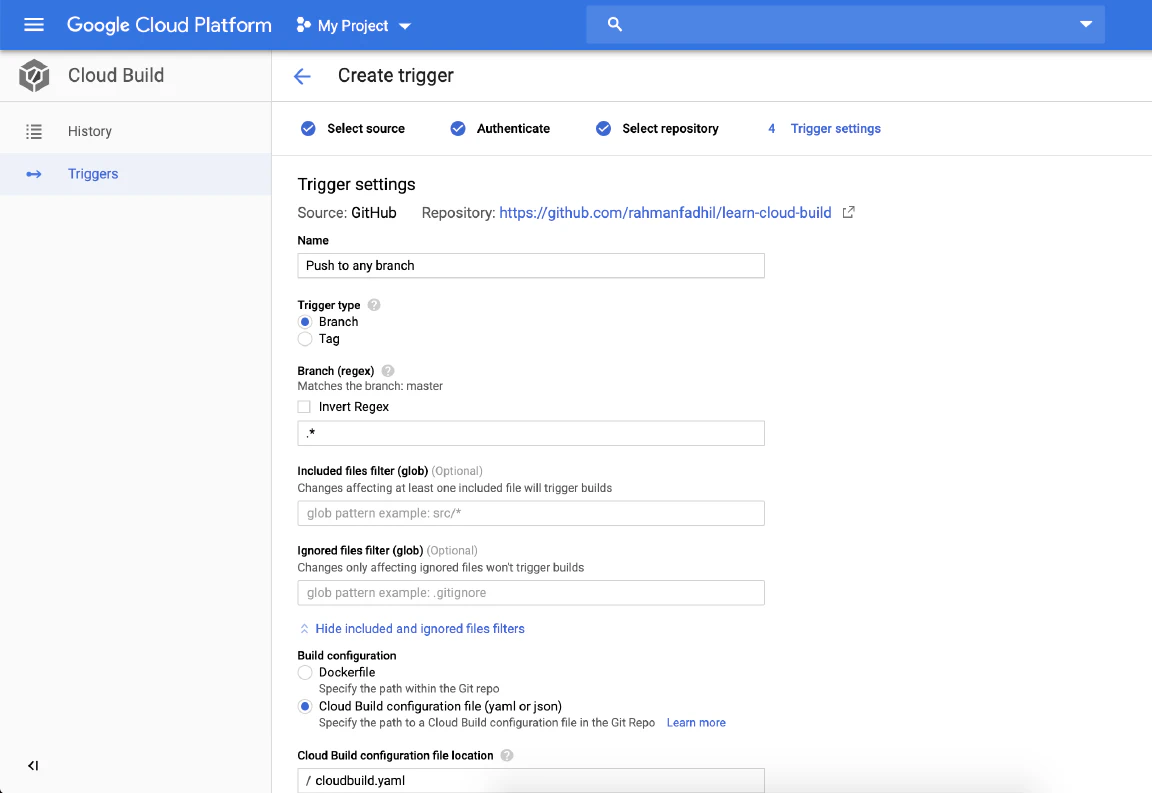
Now, everything is set! you can trigger build clicking the “Run Trigger” button inside your triggers list.