Automate Docker Deployment with Dokku
Docker is a piece of software to simplify the creation, deployment, and execution of your applications by using containers. Containers allows you to package your application outside of your operating system environment. Instead of running different apps on different machines, you can run your container inside your machine without screwing up your operating system.
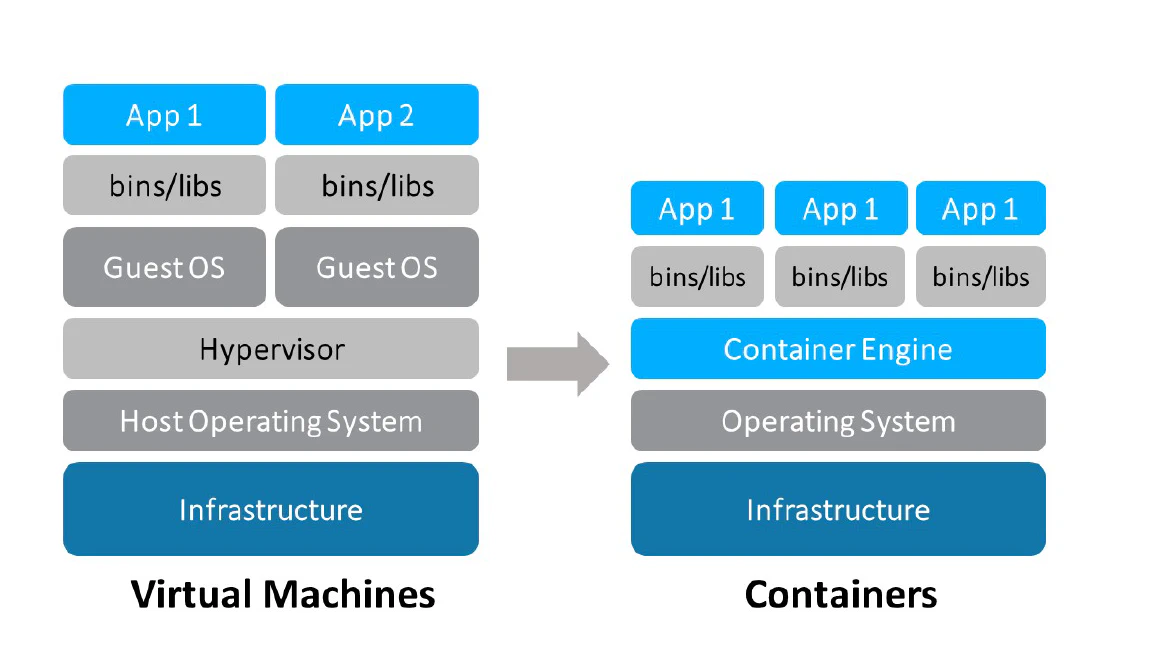
Its just like Virtual Machine. But the big difference is that Virtual Machine have a full OS with its own memory management installed. On the other hand, Docker containers are executed with the Docker Engine rather than hypervisor. Therefore, Docker containers are smaller and faster than Virtual Machines.

Dokku is an open-source self-hosted Platform as a Service (PaaS) that helps you to deploy your own web application. Dokku offers a lot of cool features like Git deployment, Port and Proxy management, and easy-to-use Plugins such as databases, in-memory store, etc. And most importantly, Dokku runs on top of Docker.
In this tutorial, we will learn how to deploy your containerized application with Dokku to your Virtual Private Server (VPS).
Prerequisites
- Docker installed on your machine.
- A Docker Hub account.
- A Virtual Private Server.
Getting started
I have prepared the boilerplate of this project. You can clone it, or you can follow along this tutorial step by step if you want.
$ git clone https://github.com/reshuttle/docker-dokku-demo.git
Clone the repository on github, and go into that folder. Then you will see something like this.
$ tree
├── default.conf
├── Dockerfile
└── index.html
Docker configuration
By default, Docker will looking for Dockerfile file in your root directory. So let’s make one.
FROM nginx:alpine

COPY default.conf /etc/nginx/conf.d/default.conf
COPY index.html /usr/share/nginx/html/index.html

EXPOSE 80
In here, we are going to make a static web page with Nginx. Nginx is an open-source, high-performance HTTP server and reverse proxy. In this case we will use Nginx to serve our static index.html page.
First, we need to use the Nginx Docker image by adding FROM nginx:alpine. We are now using the alpine version which is the smallest version of the Nginx image. Second, we will copy the Nginx configuration to the image to tell the server where is the location of our files we want to serve. Third, we will copy the index.html file which we want to serve in our server. Finally, we expose our port which in this case is 80.
Nginx configuration
To properly use the Nginx server, we need to everride the default configuration file by adding default.conf file which we will copy to our Docker image.
server {
    listen       80;
    server_name  localhost;

    location / {
        root   /usr/share/nginx/html;
        index  index.html;
    }
}
First, we want our server to listen to port 80, which specified previously in Docker configuration. Second, we will redirect every request to our root folder which contain our index.html file. We also need to specify the index file, in this case is index.html.
Static page
Our index.html is very simple.
<!DOCTYPE html>
<html lang="en">
	<head>
		<meta charset="UTF-8" />
		<meta name="viewport" content="width=device-width, initial-scale=1.0" />
		<meta http-equiv="X-UA-Compatible" content="ie=edge" />
		<title>Static Page from Docker</title>
	</head>
	<body>
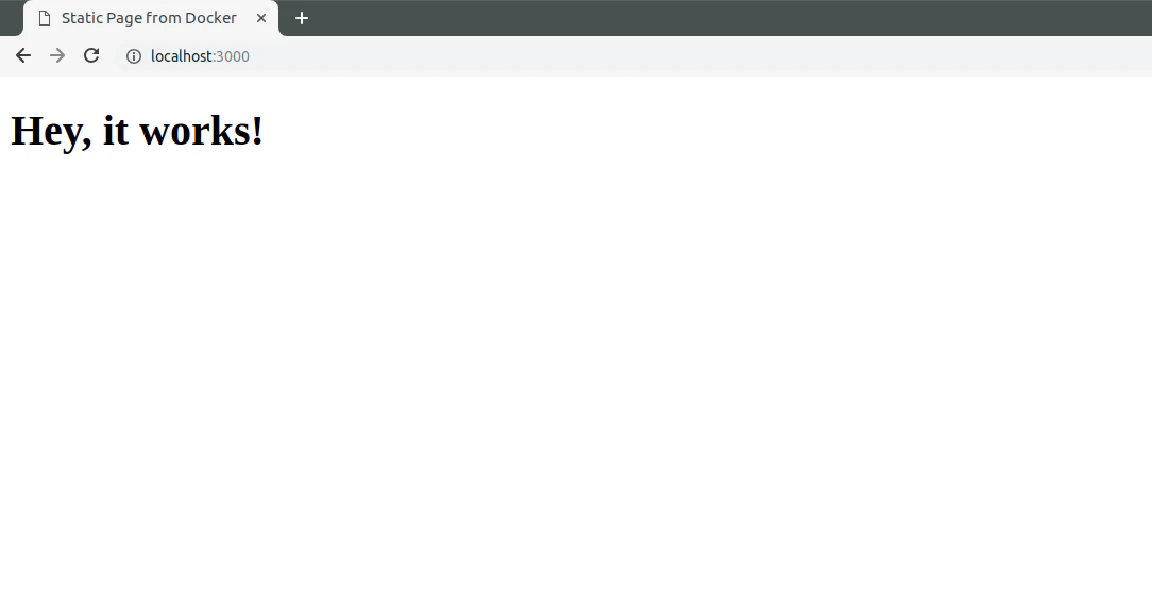
		<h1>Hey, it works!</h1>
	</body>
</html>
Run the docker image
Before running our image, we need to build it first. To test it out, let’s build our docker image by running the docker build command.
$ docker build -t <docker-hub-username>/<image-name> .
We need to specify our Docker image tag, which is basically the name of our image. Docker image tag also specify where to push our image. So make sure our Docker Hub username is correct. Then, we need to specify the root directory of the image, since you are in the root directory, you can just put .. Run this code and you will see something like this.
Sending build context to Docker daemon 81.41 kB
Step 1/3 : FROM nginx:alpine
 ---> 2f3c6710d8f2
Step 2/3 : COPY default.conf /etc/nginx/conf.d/default.conf
 ---> Using cache
 ---> 176c56cc07b6
Step 3/3 : COPY index.html /usr/share/nginx/html/index.html
 ---> 3407953dafd0
Removing intermediate container cb64bb3e3aca
Successfully built 3407953dafd0
After the building process is completed. You can run the image by running the docker run command.
$ docker run -p 3000:80 <docker-hub-username>/<image-name>
Previously in our Docker configuration, our exposed port is port 80. Now, we want to run the server in port 3000. To do that, we can use the -p flag to specify the port we want to listen in our machine.
Go to http://localhost:3000 and you will see something like this:

Setting up Dokku
In this step, you need to have a VPS. VPS basically is a physical server (or a computer) that houses your website virtually. It might sound like a shared hosting server, but it actually quite different. It cost more than the shared hosting server, but you have full access to your operating system. And that’s what we need to install and run Dokku.
There are several VPS providers out there which you can use:
Make sure the operating system that you are using on your server is Linux, because Docker only runs on it. I highly recommend to use Ubuntu.
If you already have a VPS, let’s install dokku on your machine. First, access your server (you can use it via SSH).
$ ssh root@<your-server-ip>
Then, visit the Dokku Homepage to see the installation guide. Match with the operating system you use in your server.
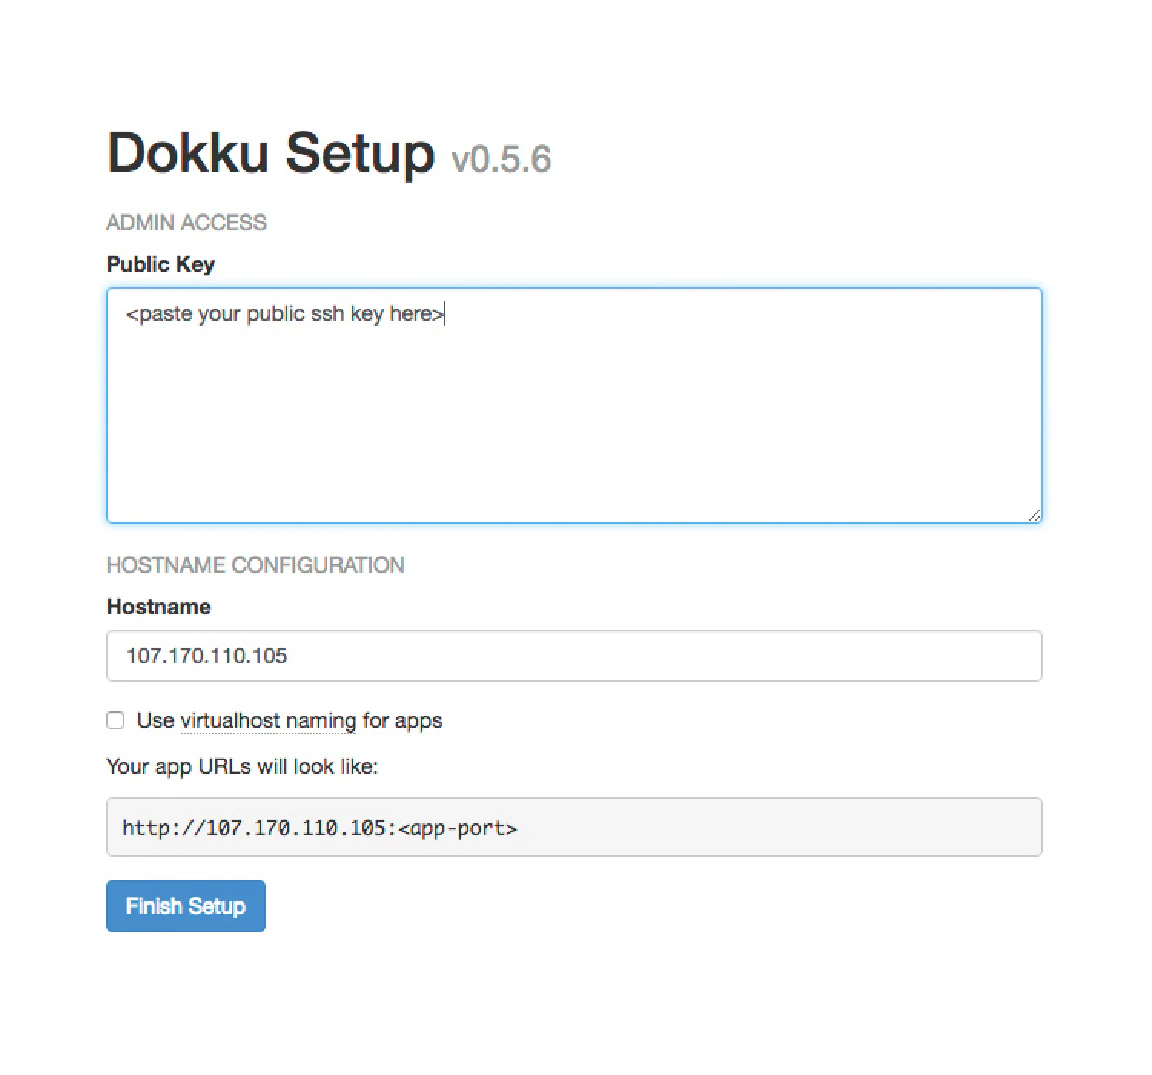
After Dokku installed on your server, access your VPS ip address. You will the the web installer of Dokku. You need to submit your Public SSH Key. You can learn more about public key and how to generate one here.

Deployment
To do this, we are going to use the Git Deployment feature that Dokku offers. To use this feature, make sure that you have initialized Git repository to your project. To check if your project is already initialized, you can run git status.
$ git init
Then, Access your VPS via SSH and create a new Dokky application by running following command.
$ ssh root@<your-server-ip>

$ dokku apps:create <your-app-name>
If your application need to store data into database, you can do it by adding plugins to your Dokku apps. There are certain plugins you can install such as MySQL, Postgres, Redis, and much more. To install a plugin you can run following command.
$ dokku plugin:install https://github.com/dokku/dokku-postgres.git
$ dokku postgres:create <your-app-name>
Now you can deploy your app to your Dokku server. All you have to do is add a remote to name the app. Dokku will looking for the Dockerfile in the root directory of your repository and build it on your Dokku server. Simply by running this following command.
$ git remote add dokku dokku@<your-server-ip>:<your-app-name>
$ git push dokku master
When the deploy finishes, the application’s URL will be shown as seen above. Then, you are good to go!
Conclusion
Docker is a great tool to learn these days, specially if you want to be a fullstack developer. Don’t care what programming language you develop, what libraries you use, everything can be done with Docker. But deploying a docker container is not that easy, so Dokku make our life easier.